Inline Checkout
All the power of Paddle in an embedded checkout that looks like it's part of your site. Inline checkout is fully customizable and lets you collect advanced datapoints, making for a seamless checkout experience.
Inline checkout works by embedding an iframe on your page when the checkout loads. You can customize your checkout in your Paddle account, creating an experience that matches your branding to maximize conversion.
As your customer moves through the checkout, use events to dynamically update your page. With events, you can change totals text, present relevant information, or build breadcrumbs to highlight the journey through checkout.
Implementing Paddle for the first time? Start with our connect a checkout tutorial instead.
Before you begin
- Add your domains in your Paddle vendor dashboard under Checkout > Request Domain Approval.
- Create a one-time product or subscription plan in your Paddle dashboard.
Domain approval keeps everyone who uses the Paddle platform safe. You don't need to wait for your domain to be approved to test locally, but you can't go live without domain approval. Learn more about domain approval
Get started
Implement inline checkout in four steps:
Set up Paddle.js
Paddle.js is a JavaScript library that lets you build rich, integrated buyer experiences on top of Paddle.
Include Paddle.js
To start building a checkout, include Paddle.js on your page:
preparing...
You should always load Paddle.js directly from
https://cdn.paddle.com/, rather than self-hosting.
Pass your vendor ID
Your Vendor ID lets Paddle.js know which Paddle account this checkout is for.
Pass your vendor ID in the Paddle.Setup() method:
preparing...
Find your Vendor ID on the Authentication page in your Paddle dashboard.
Set sandbox environment (optional)
If you're testing in the Paddle sandbox, use the Paddle.Environment.set() method to set your environment to sandbox.
preparing...
You don't need to set an environment if you're live.
Embed inline checkout
Use the Paddle.Checkout.open() method to open your checkout.
Pass essential parameters
Pass in parameters to tell Paddle where to display the inline checkout iframe, style and size, and product information:
Class name of the <div> element where the checkout should be rendered.Show all...
Styles to apply to the checkout <div>. min-width must be set to 286px or above with checkout padding off; 312px with checkout padding on. Use frameInitialHeight to set height.Show all...
Height in pixels of the <div> on load. Do not include px. Recommended 450.Show all...
ID of the product, subscription, or bundle that this checkout is for. Required if passthrough is not set.
Display mode that the checkout should use.
Make sure that your checkout frame height has enough space to grow to avoid scrollbars. The height of the frame depends on the number of payment methods you have:
| Number of payment methods | Minimum recommended height |
|---|---|
| 1 | 517px |
| 2 | 621px |
| 3 | 669px |
| 4+ | 808px |
The
Paddle.Checkout.Open()method comes with a bunch of parameters to help you optimize for conversion. For a full list, see: Checkout parameters
In this example, we pass the essential parameters to Paddle.Checkout.Open():
preparing...
Pass recommended parameters
The Paddle checkout is a two-step process:
- The first step asks for the customer's location and email address.
- The second step asks for payment information.
If you have your customer's location and email address, you can prefill this information. The checkout opens on a page asking for payment details, making for a simple one-page checkout experience.
Prefill the customer email field on the checkout.
Prefill the customer country field on the checkout. Requires email to be prefilled. See: Supported countries
Prefill customer 'ZIP/Postcode' field on the checkout. Requires country to be prefilled. See: Supported countries
Handle checkout loading
You can load inline checkout when the page loads or in response to an event. There may be a slight delay before it's rendered after the main page content has loaded.
If you like, you can use the loadCallback parameter to trigger a function when the checkout is opened. For example, you could show a spinner or progress bar while the checkout initializes.
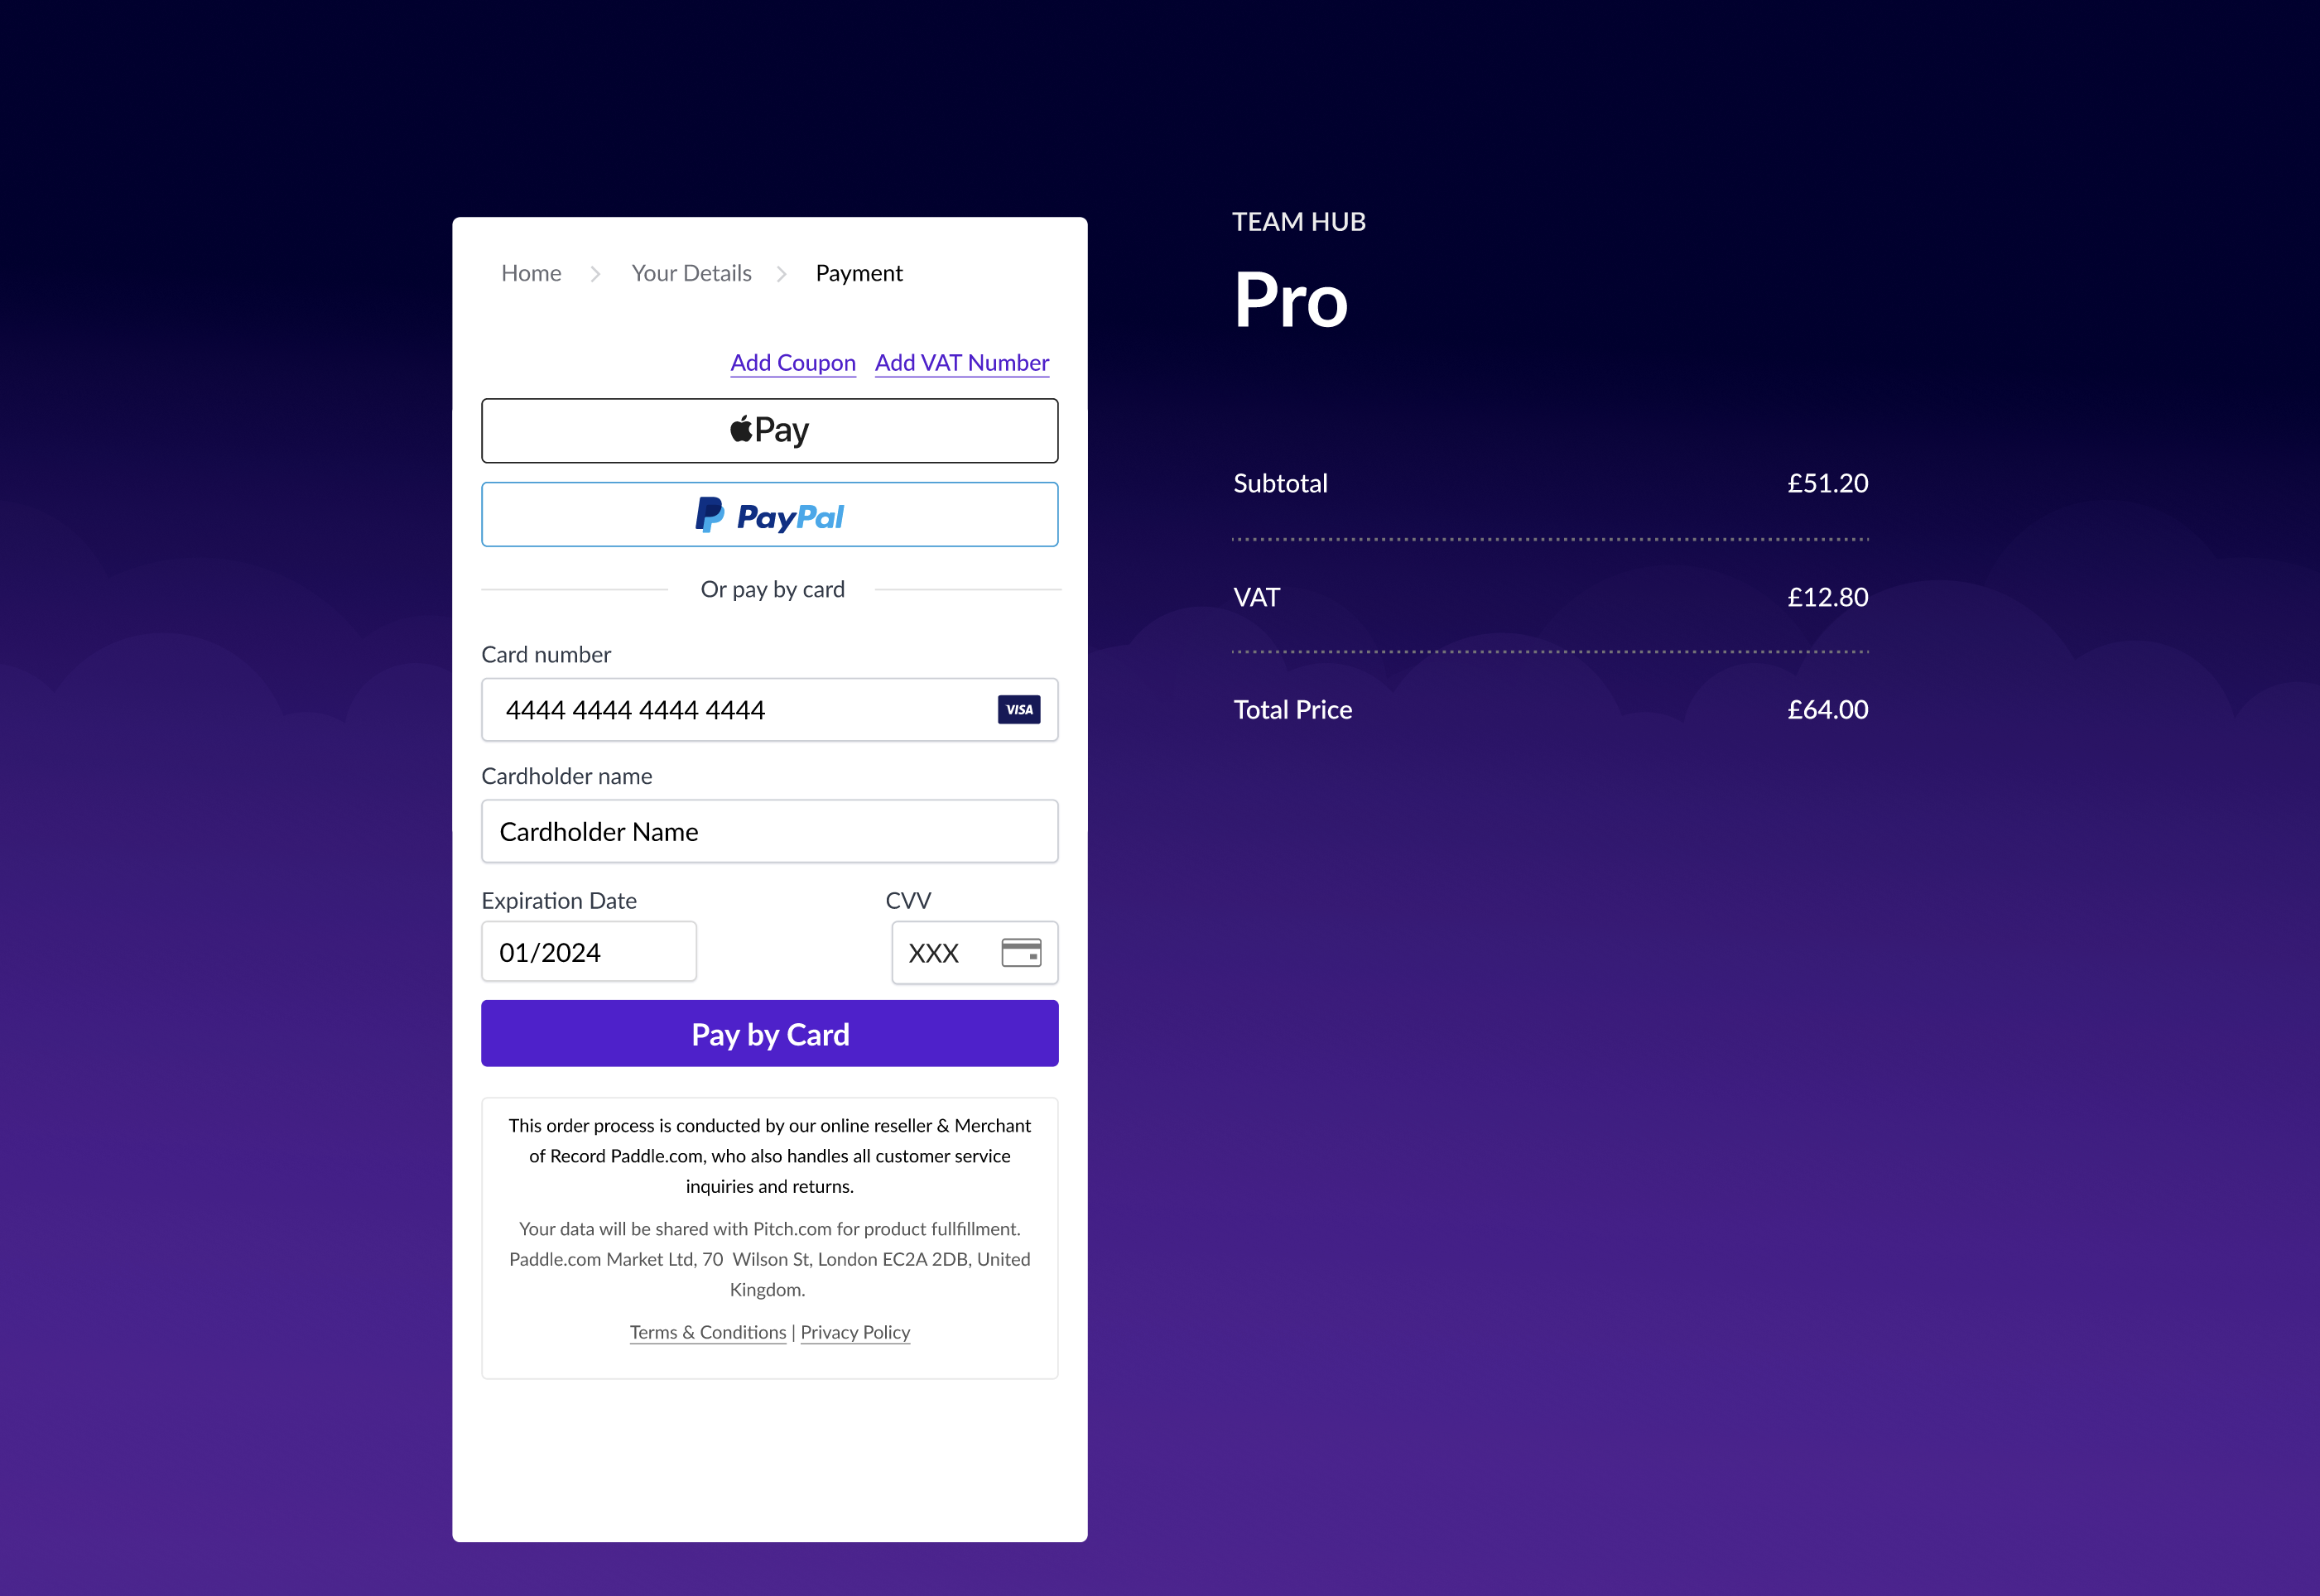
Show and update sale information
The inline checkout iframe doesn't include a breakdown of items. It's designed to handle capturing customer and payment information, giving you the flexibility to show information about what your customer is buying elsewhere on the page.
On your page, you'll need to show:
- Product name or subscription plan name
- Product price or subscription plan price and billing period
- Quantity information, if required
This information may change as a customer moves through the checkout process. For example, if a customer adds a coupon or VAT number, then prices and totals may change.
In this example, we show and update net price, sales tax amount, total price, and subscription billing periods in response to changes in the checkout — including changing currency:
preparing...
Brand your checkout
Inline checkout comes with over 50 styling options to let you create a checkout experience that's fully integrated. You can change colors, borders, shadows, text, and other options directly from your Paddle dashboard — no engineering resource needed.
Looking for inspiration? Check out our blog post on designing great checkout experiences: Design flexibility for the Paddle Checkout
Get started
Go to Checkout > Branded Inline Checkout in your Paddle dashboard to get started.
For the best editing experience, we recommend using a monitor with a screen resolution of at least 1284px wide. This means you'll be able to see the styling options and preview side-by-side.
General
The first set of options in the General section lets you change:
- font
- focus state of fields
- checkout padding
The default font is Lato, a popular humanist font that fits into most designs. You can choose from a selection of system fonts instead. If your chosen font can't be loaded on your customer's device, Paddle falls back to Helvetica Neue, Helvetica, Arial, then the system default sans-serif.

The focus state of fields determines the border color and shadow when a field is selected.
Checkout padding is on by default. Turn it off to let your checkout fill the full width of the iframe, which may be useful if you have your own padding set on your website.
Buttons
Some buttons are shown as part of checkout, for example:
- Pay Now
- Subscribe Now
- Pay by Card
- Change Payment Method
- Cancel
You can customize button size, text, color, and design using the options in the Button section.

Inputs
Inputs are fields where customers enter their details. This includes the labels (e.g. "Cardholder name") and input boxes themselves.
You can turn off labels altogether for a more compact design. Labels show inside their respective fields until clicked.

Label position doesn't apply to mobile devicesOn mobile devices, labels always show at the top-left of input fields.
Links
Inline checkout includes links for:
- Add Coupon
- Add a VAT number
Change the style of these using the options in the Links section.

Messages
The messages section lets you style:
- The Paddle merchant of record footer message
- The notification that appears when a coupon has been applied successfully

The Paddle merchant of record footer message must remain legible to keep your checkout legally compliant.
Next steps
- If you're testing in the sandbox, prepare to go live.
- Streamline the checkout process for buyers by passing parameters.
- Learn more about the other methods available in Paddle.js.