We introduced our Inline Checkout in 2018 , as a way to embed the Paddle Checkout directly onto a webpage, in place of the focused experience of the existing Overlay checkout.
Today we’re excited to share the release of Branded Inline Checkout, a new set of styling options to help you create a more seamless experience. All easily controlled from within the Paddle dashboard. For teams that want full control over branding without sacrificing performance, Paddle's online checkout offers the flexibility to match your product's look and feel end-to-end.
To help you get the most out of these new features and build a well-converting Inline Checkout, we’ve looked at some best practices for successful implementation from our software sellers around the world.
Optimizing for conversion
Optimizing your checkout for conversion has a lot of dependencies, for example:
- Where your checkout appears in the customer journey.
- Whether or not your users have already been using a free trial (which means you likely already have some details from them, like their email address).
- The level of intent the customer has to make a purchase in the first place.
The tips below will help you get the most of these new features. When you’re deciding which to implement, think about your existing signup and payment experience, and your desired billing model to help identify what will work best for you and your customers.
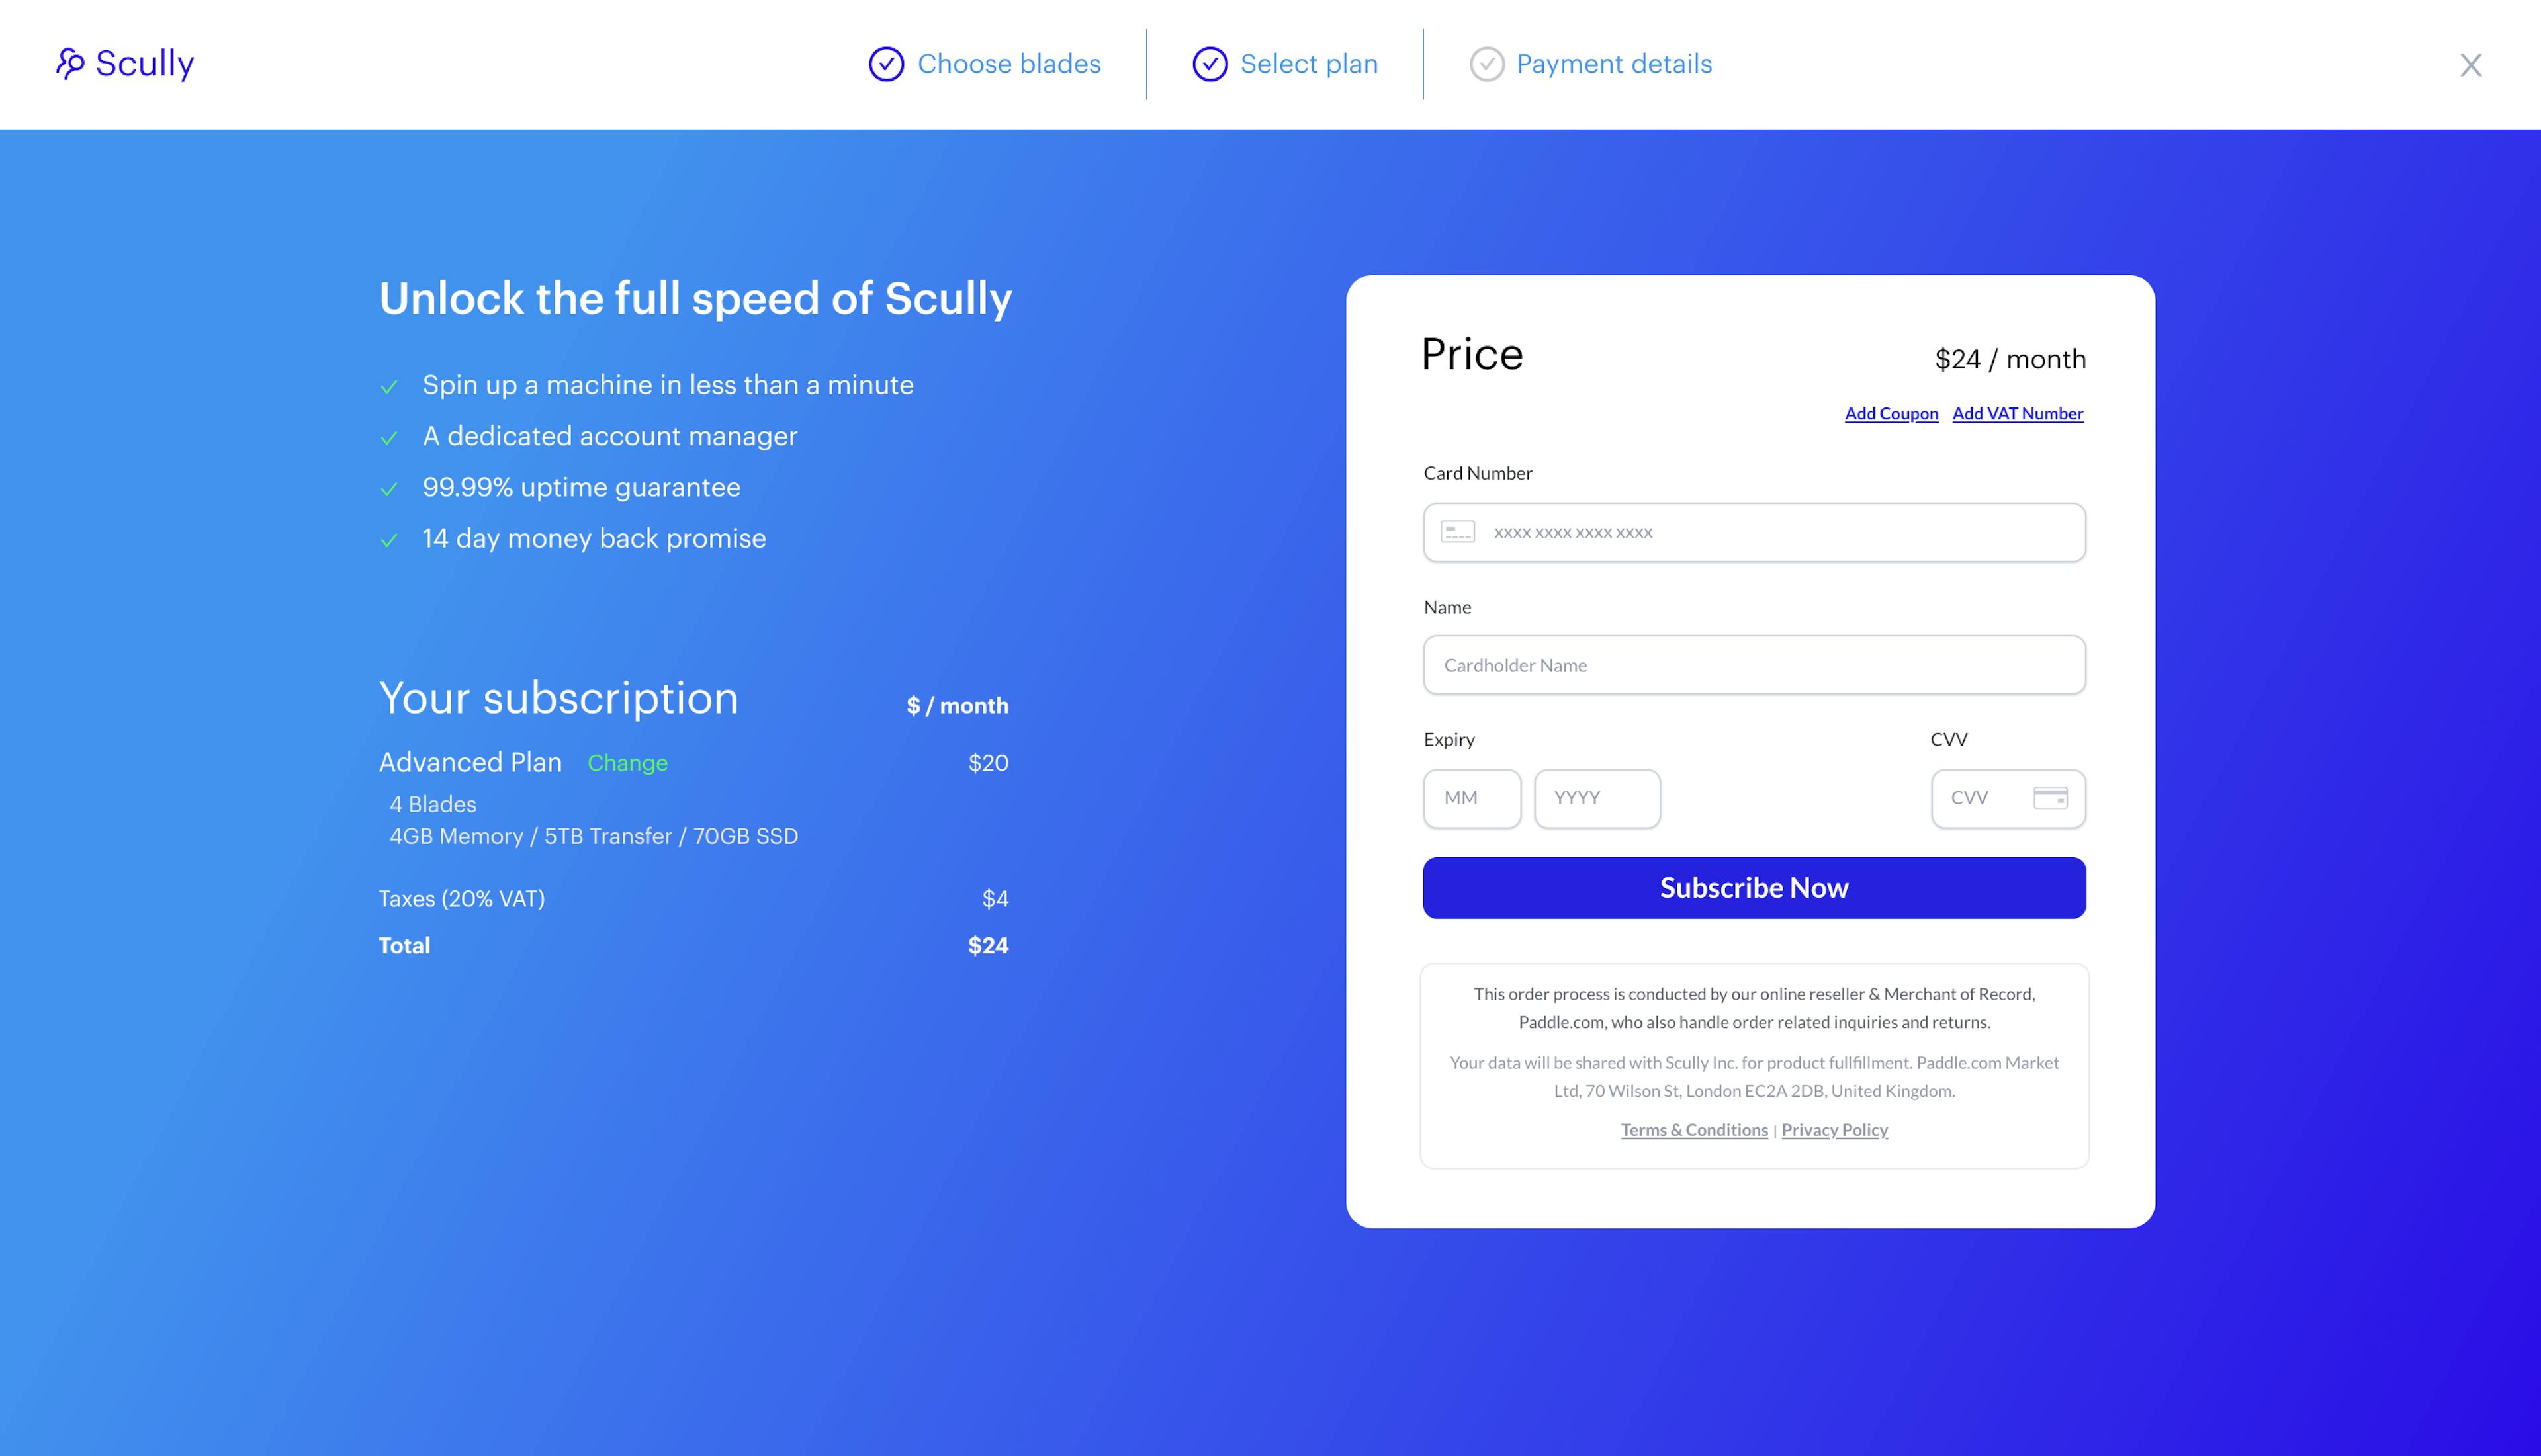
(Image: An example of a checkout embedded into a payment flow, mirroring the site’s brand design.)
1. Signpost your pricing clearly throughout the buyer journey
It won’t come as a surprise that customers want to know how much something is going to cost before they make a purchase.
But this goes beyond your pricing page. Your customers need reassurance that the price they see in the checkout isn’t going to change. Paddle’s Inline Checkout makes it easier to display the necessary information how you want to, across your entire checkout flow. While this puts the responsibility on you to display the pricing information, it also gives you more control than the Overlay checkout where the price is automatically shown for you.
Some things to bear in mind:
- Signpost pricing and billing period clearly so that your customers know how much your product or service costs before they hit the checkout.
- Ideally, the price you display alongside the embedded checkout should be the total cost, including any taxes. This may change later in the checkout process (for example if the customer enters a sales tax number) so use ‘callbacks’ to update this price dynamically.
- Be consistent in how you display the pricing. For example, don’t only show the monthly price to a customer who will be paying the annual fee or switch between formats later on.
- Keep the checkout experience localized. You can again listen to ‘callbacks’ from the embedded checkout to pick up the currency and converted price to display.
- If you want to let the customer change the price from the pricing page itself (e.g. by adding extra features), you can use the Pay Link API to pass custom prices into the Inline Checkout.
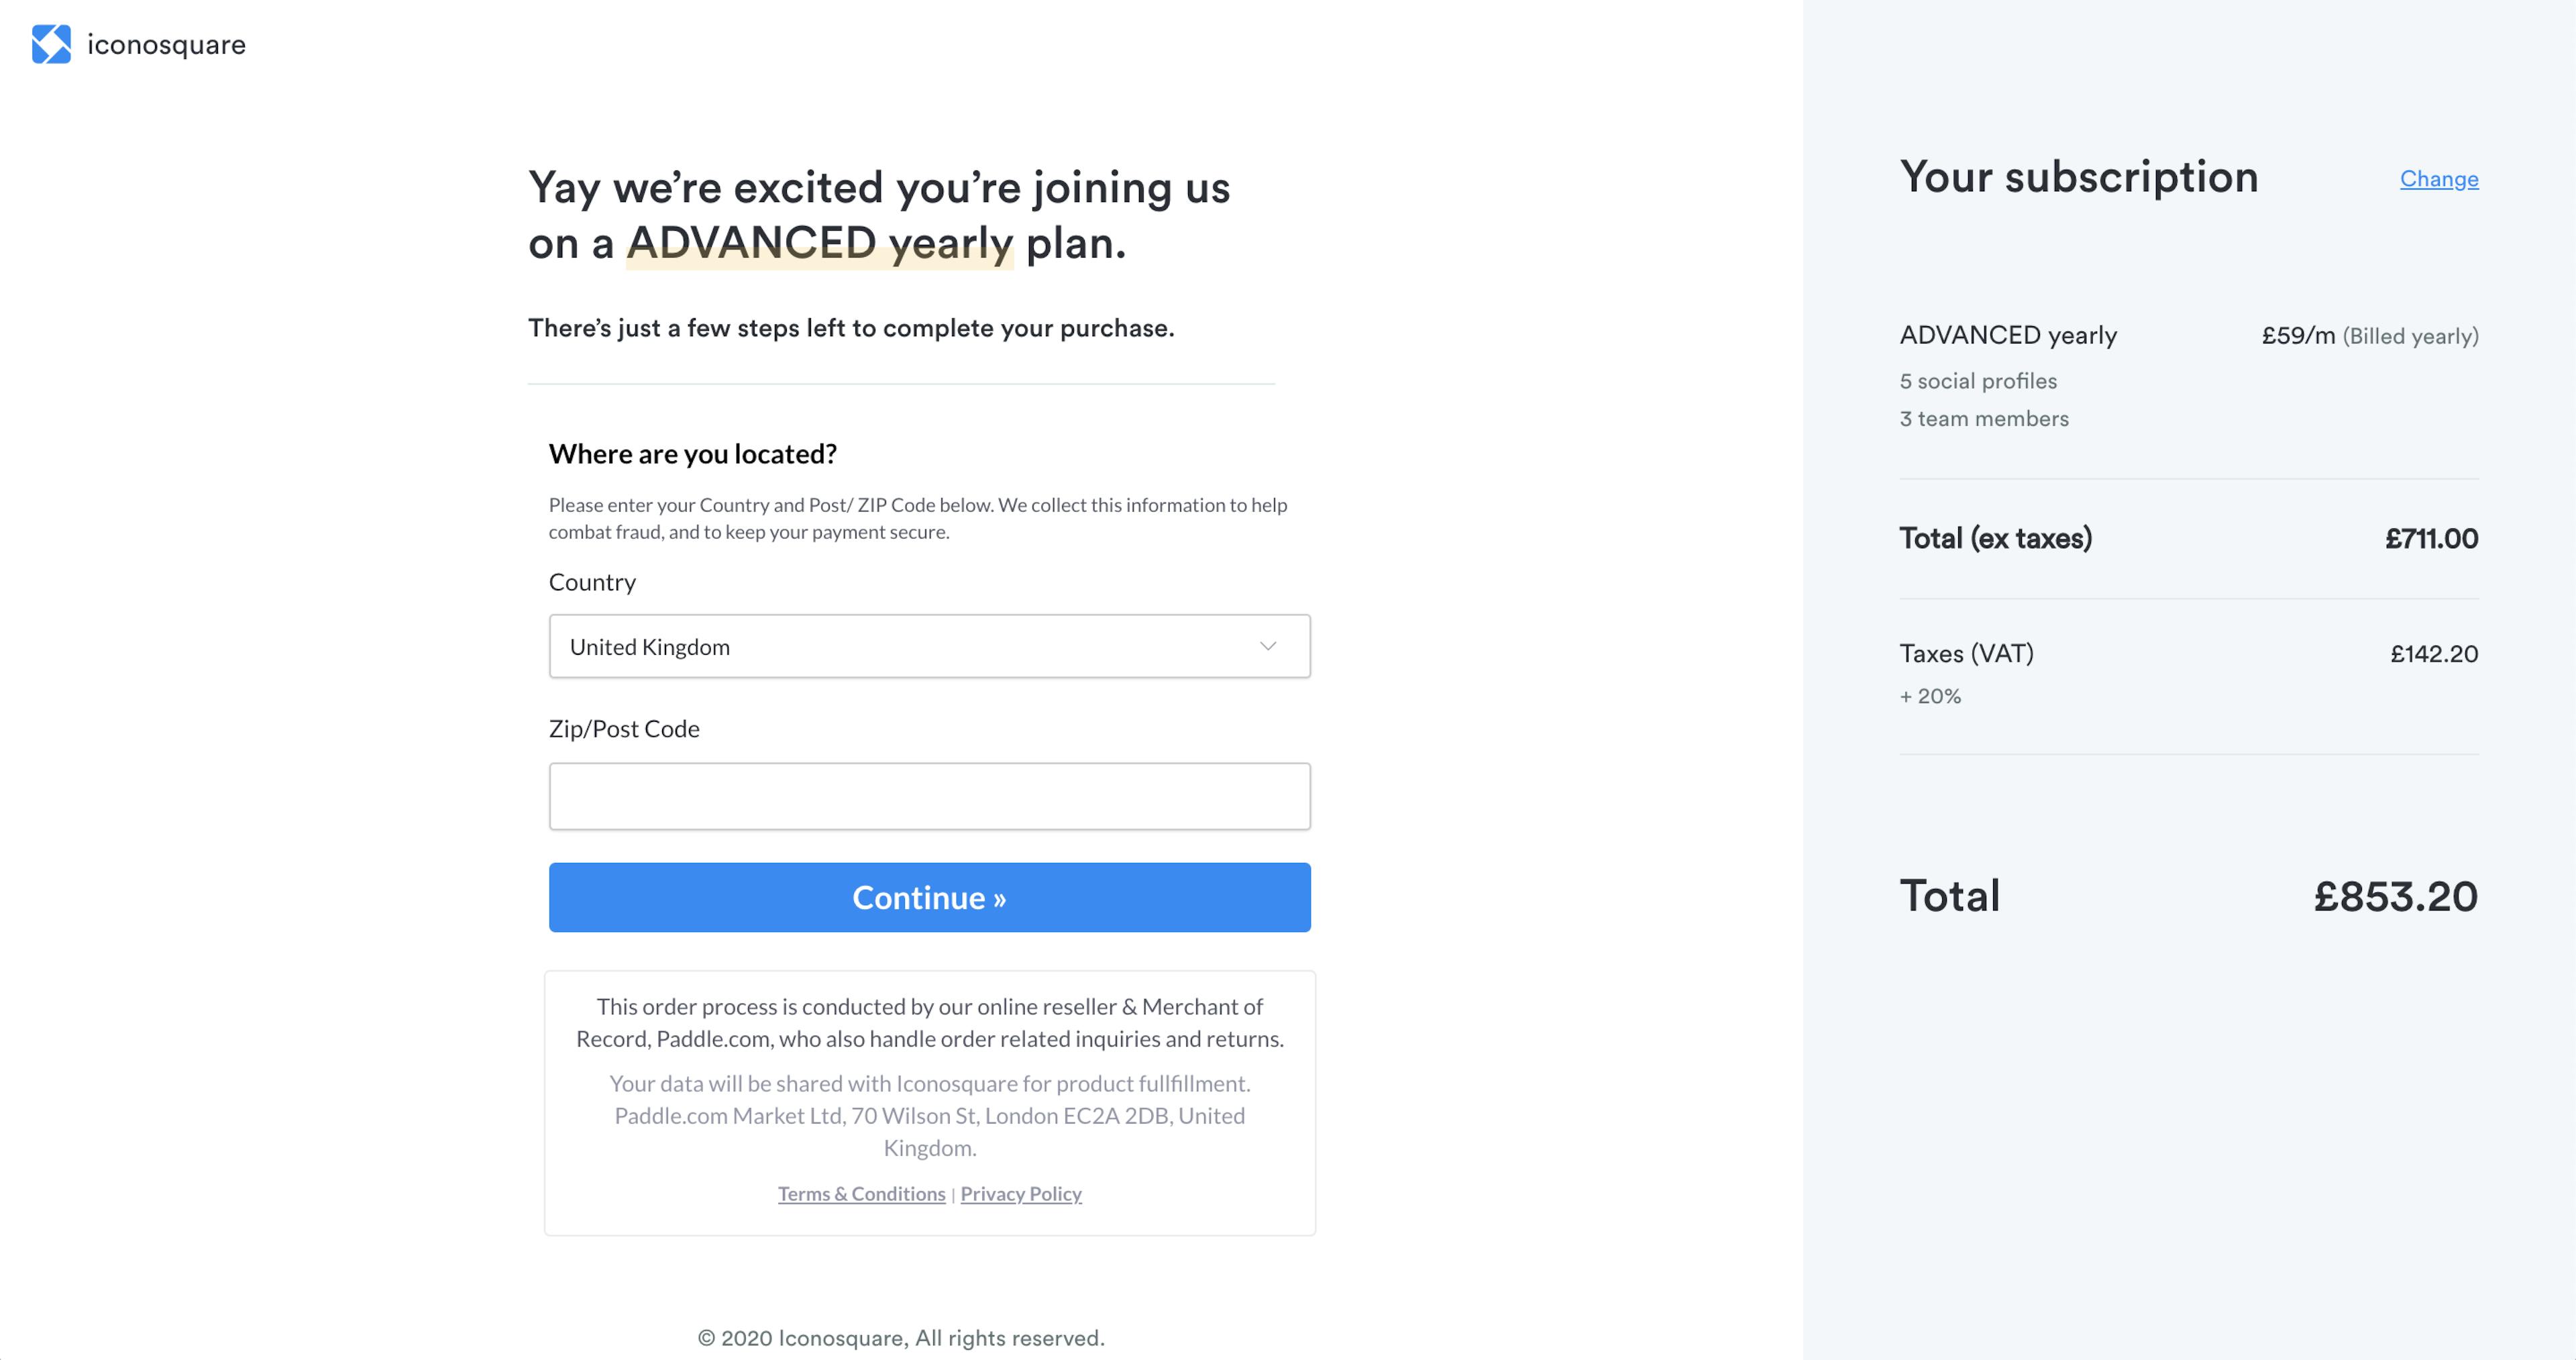
(Image: An example Inline Checkout from Paddle seller, Iconosquare .)
2. Support conversion with additional content
With the Inline Checkout, you’ll need to support your customers through the process by including some transactional information about their purchase including: product or subscription plan name, product or subscription price and billing period, and quantity information about their purchase (e.g. number or seats or licenses) but you can also reassure them and encourage them to complete the checkout with additional content.
For example, we see Sellers include:
- Money back or cancellation guarantees.
- Testimonials, ratings, and other social proof.
- The benefits or product features the customer will get with their purchase.
3. Create a seamless, branded checkout experience
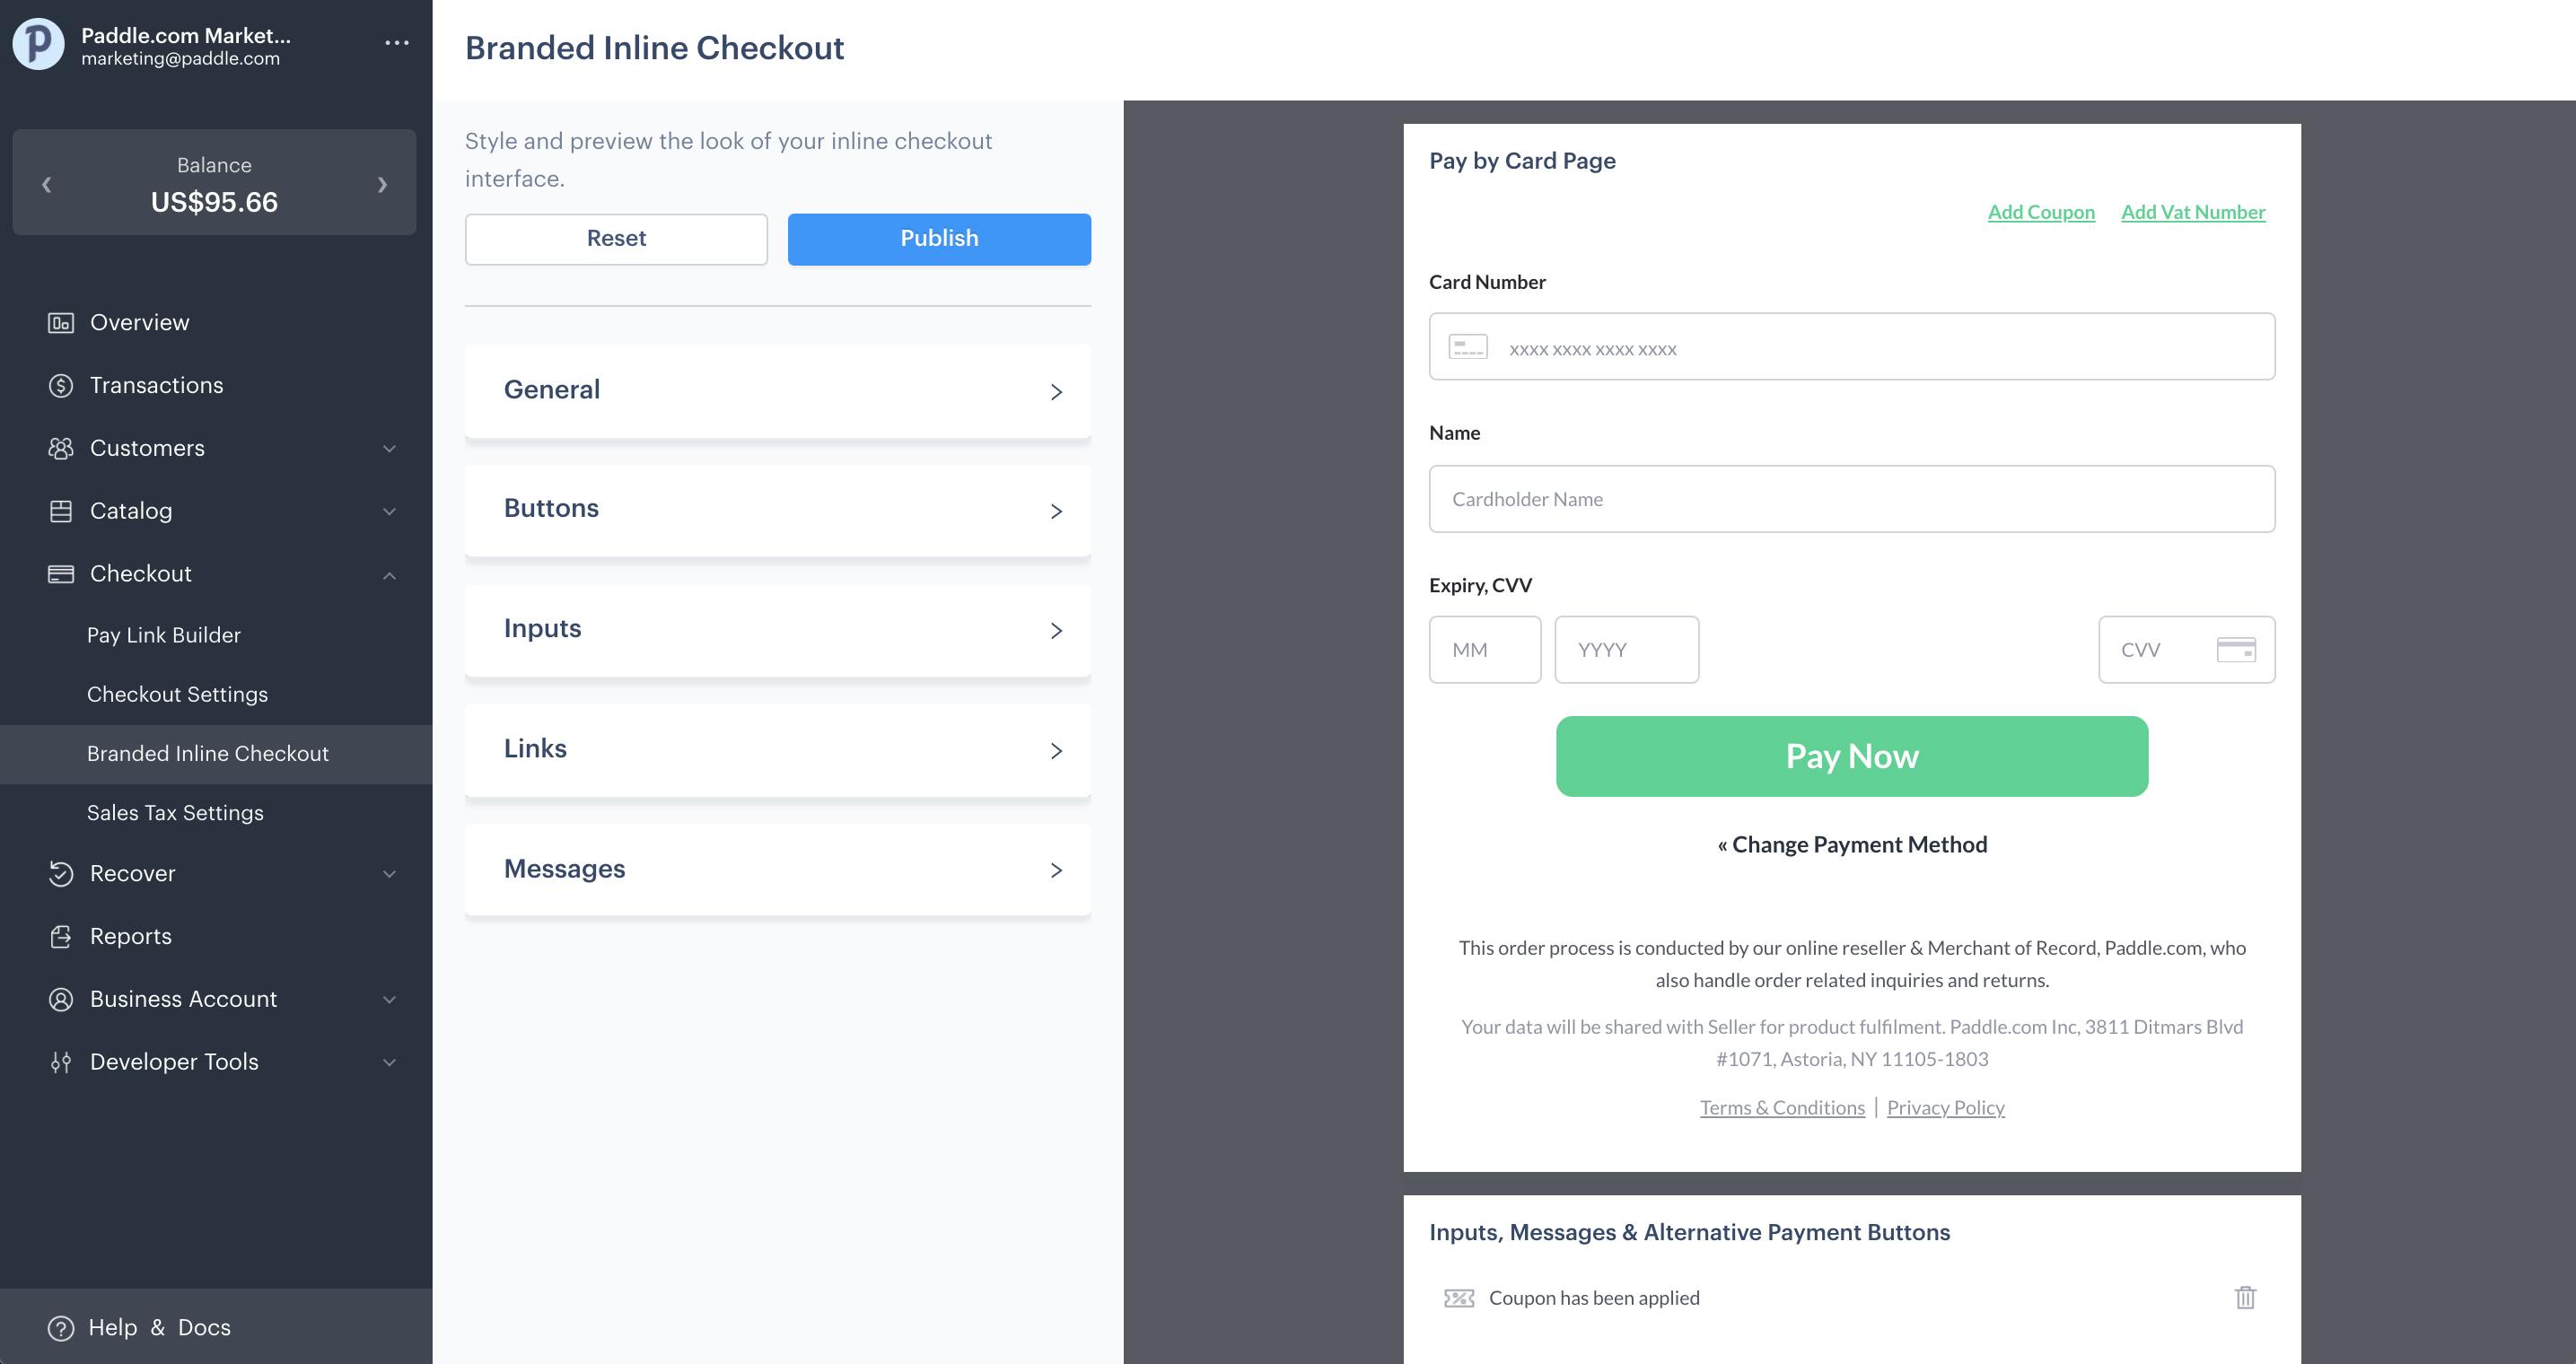
With Branded Inline Checkout, you can customize the style of your checkout to match your brand and website design, creating a friction-free checkout experience.
You can easily customize your checkout from the Paddle dashboard, including:
- Button sizing and color
- Font sizing
- Border color, width, and radius
- Text input and placeholder text font size, and colors
- Message box borders & background colors
Click here for a full list of formatting options.
As well as creating a seamless, branded experience, it’s also important to take accessible design best practice into account to keep your checkout user-friendly and optimized for conversion. For example:
- Keep your checkout accessible. Be wary of low contrasting or similar color combinations (e.g. you might want to avoid using Red on the ‘Pay’ button and Green on the ‘Change Payment Method’ button) as these could make your checkout hard to read.
- Use colors and styles from your branding to reassure the customer that the checkout is part of your site. For example, match the border-radius on the checkout buttons if your other buttons are rounded. Just be sure the checkout Call to Actions are still impactful and don’t blend in too much!
- Remember to keep font colors, background colors, and the background of your site distinct so that nothing is ‘invisible’. (Especially not the Checkout footer message; this should remain legible at all times to keep your checkout legally compliant!)

Renderforest saw a 5% increase in conversions from optimizing their checkout branding.
“It works perfectly! Now our checkout looks more coherent with our general design; these are great tools," Zhenya Karapetyan, Senior UX Designer at Renderforest.
4. Pass in details for a seamless customer experience
Depending on the billing model you use, you might be able to reduce friction in your checkout flow by passing in the customer information that you have already collected. This way, when a customer goes to create an account, they don’t need to repeat steps.
If you use a Freemium model, for example, you might be able to pass in information like email address, Country code, Zip Code (or postal code) data that you collected on initial sign up.
If you serve business customers, you can also initiate the Pay Link API to pre-fill tax information (like their VAT Number, VAT company name, and VAT address) into your Inline Checkout.
5. A checkout to suit your users
How you customize your checkout should be dependent on the customers you serve. Think about what a business customer will expect in contrast to a Professional Consumer.
For example, for a business customer you might need to split out their extra costs on Integration, Account Support, Add-Ons as well as displaying the tax breakdown.
For consumers it’s much more important to make sure your pricing is really clear – and to clearly display the discounted price should a sale or coupon be applied.